Drive Mad Level 104 Walkthrough - High Kick Guide
Complete Drive Mad level 104 walkthrough. Learn how to beat High Kick by using the circular launcher to trigger the mechanism, lifting the stone wall, and driving through once t…
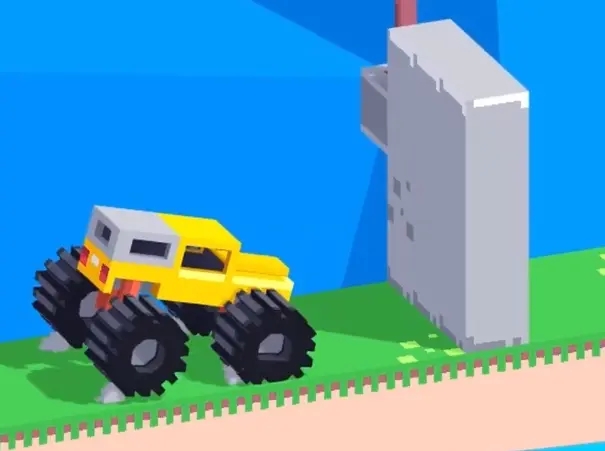
Drive Mad level 104, called High Kick, is a medium level built around mechanism triggering and momentum control. As part of the full Drive Mad levels progression, this stage is not really about forcing your way through the obstacle in front of you. The tall stone wall is meant to block the path until you activate the device behind it. To clear the level, you need to use the circular launcher and the truck's body angle to hit the trigger that presses the upper button. Once that mechanism fires, the wall rises and the route to the finish becomes open. The level becomes much easier once you stop treating the wall as the main obstacle and start treating the trigger as the real target.
Why Level 104 Feels Hard
This Drive Mad level feels awkward because the solution depends on hitting a mechanism indirectly instead of just driving forward. The truck has enough power to reach the trigger area, but the contact angle is easy to miss. A straight approach sometimes fails to press the device cleanly, which makes the level look more complicated than it really is. In practice, the puzzle is very small: generate enough movement to touch the trigger, then adjust the rear wheels if the first attempt does not activate it.
Step-by-Step Walkthrough for Drive Mad Level 104
Step 1: Use the launcher section to carry the truck into the trigger area
Start by using the circular launcher to give the truck enough movement toward the mechanism. The goal is not to smash randomly into the wall. You want the truck to reach the trigger point that can activate the upper button. Let the launcher provide the needed momentum and focus on getting the truck into contact with the mechanism cleanly.
Step 2: If a forward hit misses, use the rear wheels to lift and trigger the mechanism
If the truck does not activate the mechanism from a normal forward approach, switch to a reverse adjustment. By backing up and lifting the rear wheels, you can change the truck's contact angle and poke the trigger more effectively. This is the most reliable correction if the first touch fails. The key is to let the rear section do the activation instead of insisting on a flat front hit.
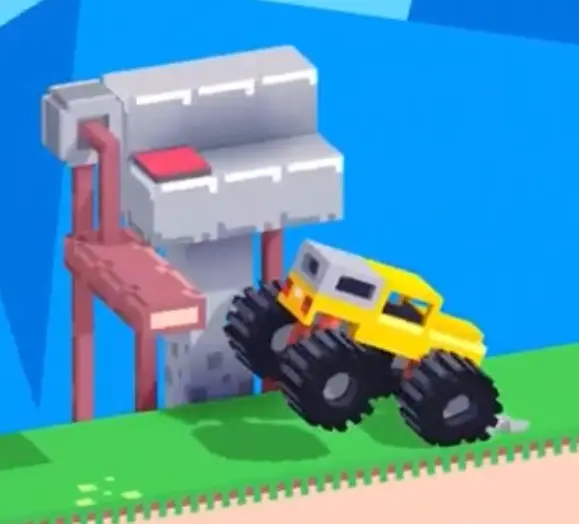
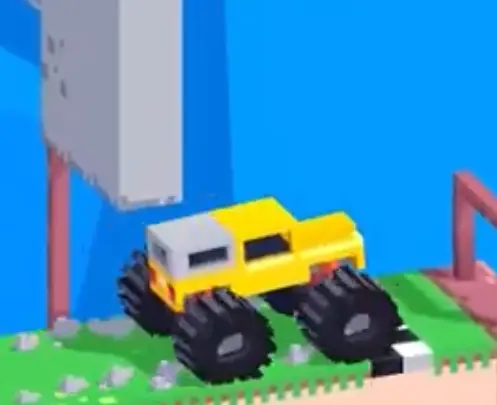
Step 3: Drive through once the stone wall rises
As soon as the mechanism activates the upper button, the stone wall lifts and the path becomes clear. At that point, the hard part is already over. Just continue forward through the opened route and drive onto the checkered finish platform.
Best Cue for Consistent Clears
Hit the trigger, lift the wall, then drive through.
Why This Method Works
This method works because the level is controlled entirely by the mechanism above, not by the wall itself. The truck only needs enough momentum to reach and activate that trigger point. If the first angle does not work, using the rear wheels changes the contact geometry and makes the activation much easier. Once the button is pressed, the wall rises automatically, so there is no longer any need for precision or speed. Breaking the level into trigger first, passage second makes the puzzle much more consistent.
Common Mistakes in Drive Mad Level 104
- Trying to force straight through the wall instead of activating the mechanism
- Ignoring the launcher momentum and arriving too weakly at the trigger
- Repeating the same front hit when the angle is wrong
- Forgetting to use the rear wheels as a backup trigger method
- Overcomplicating the finish after the wall has already lifted
Fast Summary
- Use the launcher to reach the trigger mechanism
- Try to activate it with forward momentum
- If needed, lift the rear wheels to hit the trigger
- Wait for the stone wall to rise
- Drive through to the finish
FAQ
How do you beat Drive Mad Level 104?
Use the launcher to reach the trigger mechanism, activate the upper button, and then drive through once the stone wall rises.
Why is Drive Mad Level 104 difficult?
Because the real objective is not the wall in front of you, but the trigger that lifts it. The tricky part is getting the truck to hit that mechanism at the correct angle.
What is the key trick in Drive Mad Level 104?
The key trick is to use the rear wheels as an alternate way to activate the trigger if a direct forward hit does not work.
What should I do after the wall rises in Drive Mad Level 104?
Just drive forward to the checkered finish. Once the wall lifts, the puzzle is already solved.