Drive Mad Level 66 Walkthrough - Hamster Wheel Guide
Complete Drive Mad level 66 walkthrough. Learn how to beat Hamster Wheel by controlling angular momentum, keeping your truck near the 5 o'clock position inside the wheel, and ro…
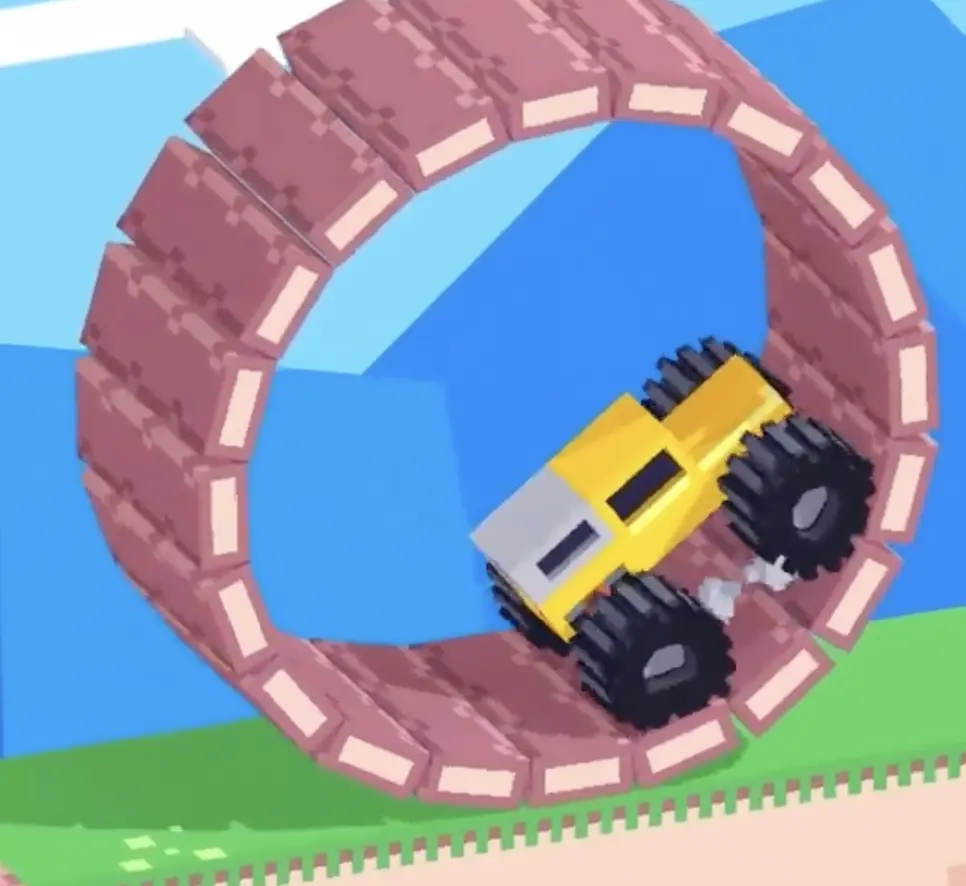
Drive Mad level 66, called Hamster Wheel, is an easy level built around angular momentum and center-of-mass control. The truck is trapped inside a giant rolling ring, so simply pressing forward is not enough. Your position inside the wheel changes how much turning force the ring receives. At the very bottom, your weight mostly presses downward without creating much rotation. At the sides, the truck becomes unstable and can flip awkwardly. The sweet spot is the lower diagonal area, especially around the 5 o'clock position when moving right. That is where traction, leverage, and balance work together best.
Why Level 66 Feels Hard
This level feels strange because you are not driving on the stage in a normal way. You are driving inside the object that moves the stage for you. That means the important question is not just how fast you press forward, but where your truck sits inside the wheel while doing it. If you stay too low, the wheel does not gain enough turning force. If you climb too high, the truck becomes unstable and can lose balance. So the whole level is about maintaining a productive angle instead of blindly accelerating.
Step-by-Step Walkthrough for Drive Mad Level 66
Step 1: Warm up with small inputs and feel the wheel's response
At the start, do not mash the throttle. Use small forward and backward inputs to understand how the ring reacts to the truck's movement. This quick warm-up teaches you how unstable the environment is and how easily the truck's position shifts inside the wheel. The goal is not to gain speed yet. It is to build a feel for the timing and feedback of the rolling frame before you commit to a full push.
Step 2: Hold the truck near the 5 o'clock position to generate steady forward roll
Once you are comfortable, press forward and let the truck climb the inner wall slightly until it sits around the 5 o'clock position. That lower-diagonal angle is the most reliable place to create rolling torque while staying balanced. If the truck stays too close to 6 o'clock, you mostly add weight without enough rotation. If it rises too far toward the side, the truck becomes harder to control. So the best rhythm is to keep pressing forward while letting the truck hover in that productive lower-right zone as the wheel rolls ahead.

Step 3: Climb a little higher on the slope, then settle back and roll to the finish
When the wheel reaches the uphill section, keep pressing forward and let the truck climb a little higher than usual, closer to 4 o'clock. This gives the wheel extra leverage to keep turning uphill. Once you crest the slope, do not overdo the climb. Let the truck settle back toward the 5 o'clock position and continue rolling forward in control. After that, the finish is straightforward. Keep the wheel moving smoothly and do not make any wild balance corrections near the checkered line.

Best Cue for Consistent Clears
Do not sit at the bottom. Climb just enough.
Why This Method Works
This method works because the wheel only rolls well when your truck creates turning force instead of dead weight. At the bottom of the ring, gravity mostly pushes straight down, so rotation is weak. By climbing slightly up the inner wall, you shift the center of mass away from the wheel's vertical centerline, creating torque that helps the ring turn. The 5 o'clock position is the best compromise because it gives you leverage without throwing the truck into a dangerous side orientation. On the uphill, a slightly higher position gives you extra mechanical advantage to keep the wheel moving.
Key Tips for Level 66
- Think about your position inside the wheel, not just your throttle input
- The truck climbs higher means more torque, but also more risk
- The 5 o'clock position is usually the safest and most efficient balance point
- On the uphill, let the truck rise a little more to help the wheel keep rotating
- After the crest, settle back into a lower stable angle instead of forcing more climb
Common Mistakes in Drive Mad Level 66
- Staying too close to the 6 o'clock bottom position and failing to generate enough rotation
- Climbing too high on the side of the wheel and losing balance
- Overcorrecting when the wheel starts rolling instead of holding a steady angle
- Not adding enough climb on the uphill section and stalling short of the crest
- Getting excited near the finish and throwing away a stable position with unnecessary inputs
Fast Summary
- Start with small test inputs to feel the wheel's feedback
- Press forward and keep the truck near the 5 o'clock position
- Use that angle to generate steady rolling torque
- Climb slightly higher on the uphill to gain extra leverage
- Settle back down and roll smoothly to the finish
FAQ
How do you beat Drive Mad Level 66?
Keep the truck inside the wheel around the 5 o'clock position while driving forward so its weight creates rolling torque, then climb slightly higher on the uphill and continue to the finish.
Why is Drive Mad Level 66 difficult?
Because the challenge is not normal driving. You have to control how your truck's position inside the wheel affects balance, momentum, and rotation.
What is the main trick in Drive Mad Level 66?
The main trick is using center-of-mass offset to make the wheel rotate. The truck needs to sit slightly off the bottom so gravity and traction generate forward roll.
What usually causes failure in Drive Mad Level 66?
Most failures come from bad timing, unstable momentum, or poor balance, especially when the truck stays too low to move the wheel or climbs too high and flips awkwardly.
What is the best position in Hamster Wheel?
The most reliable position is around 5 o'clock when moving right, because it gives strong forward torque without making the truck too unstable.