Drive Mad Level 116 Walkthrough - Shockwave Guide
Complete Drive Mad level 116 walkthrough. Learn how to beat Shockwave by hiding behind the tall wall for the first blast, then sprinting across the soft bridge and finishing bef…
Drive Mad level 116, called Shockwave, is an easy level built around timing and momentum rather than technical driving. The truck is not facing a normal obstacle. Instead, the danger is a periodic full-screen shockwave that can wipe you out unless you are hiding behind solid cover. The tall wall near the start is your shield, and the bridge after it is your dash window. Once the first blast passes, you need to accelerate immediately, cross the soft bridge, and reach the finish before the next wave arrives. The level is simple once you stop thinking about precision driving and start thinking in safe windows.
Why Level 116 Feels Hard
This Drive Mad level feels tricky because the road itself is easy, but the real hazard is invisible timing pressure. If you leave cover too early, the shockwave catches you in the open. If you wait too long after it disappears, you waste the only safe window and the second blast arrives before you finish crossing. The bridge can also make players hesitate because it looks fragile, but hesitation is actually more dangerous than commitment here. The clear becomes very reliable once you trust the wall, learn the blast rhythm, and treat the run to the finish as one fast sprint.
Step-by-Step Walkthrough for Drive Mad Level 116
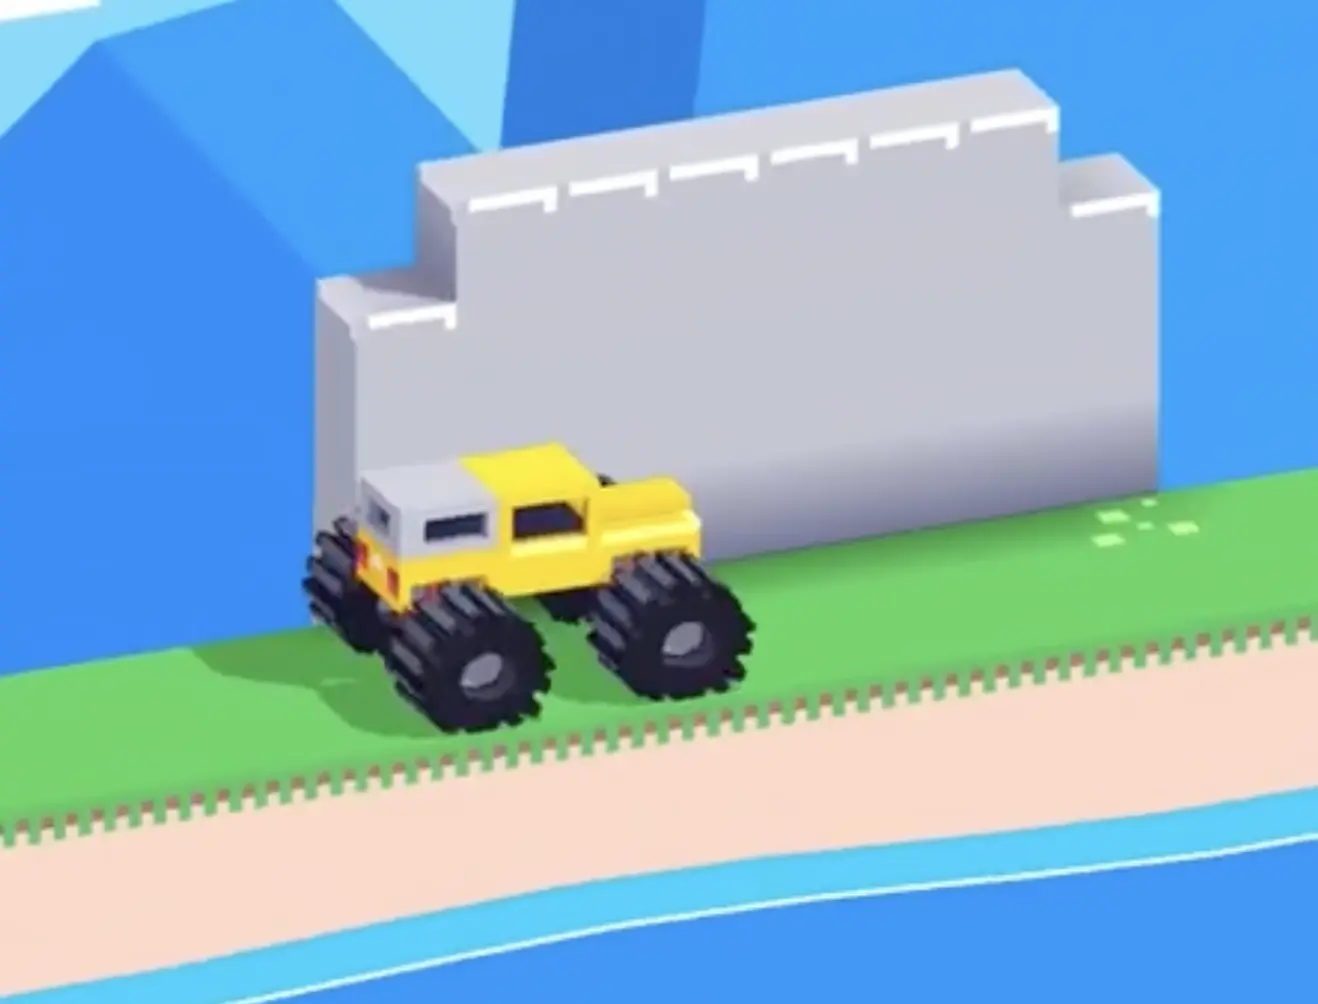
Step 1: Drive up to the tall wall and wait behind it for the first shockwave
At the start, drive forward and tuck the truck closely behind the first tall wall. Do not drift out from its cover and do not rush toward the bridge yet. This wall is the only safe shield from the opening shockwave, so make sure the truck is fully hidden behind it before the blast arrives.
Stay calm and watch the wave cycle. As long as the truck is completely covered by the wall, the blast will pass harmlessly. This first pause is intentional. The level wants you to wait, not race immediately.
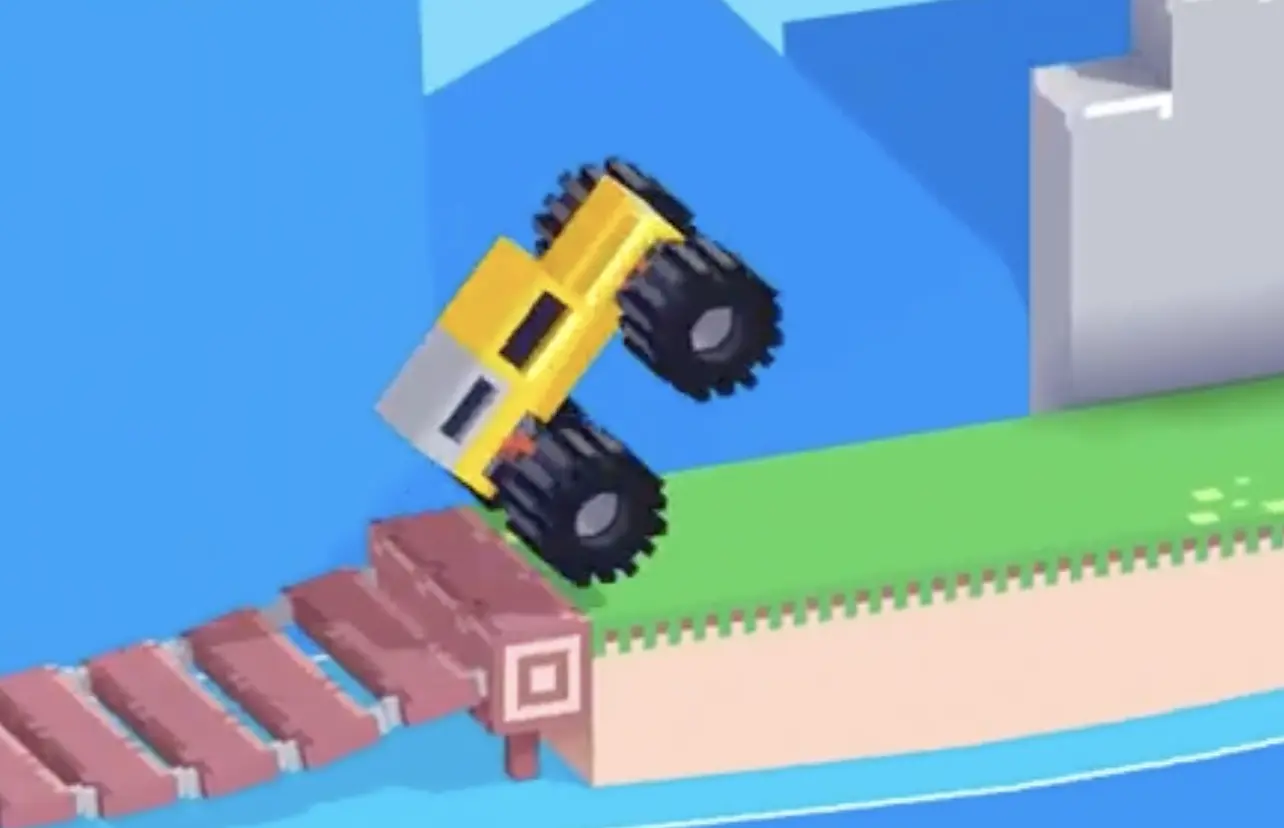
Step 2: Accelerate the moment the shockwave ends and race across the bridge to the finish
As soon as the shockwave disappears, accelerate immediately and commit to the crossing. Drive over the soft bridge, reach the far platform, and continue straight to the checker finish before the next blast cycle starts. This is the safe window the whole level is built around.
Do not pause in the middle of the bridge and do not start too late. A quick, confident run is much safer than inching forward. Once you are moving, keep the momentum going until the level ends.
Best Cue for Consistent Clears
Think in one rhythm: hide, wait, blast ends, then sprint.
Why This Method Works
This method works because the wall completely removes the risk from the first shockwave, turning the level into a simple timing puzzle. Once that first blast is gone, there is just enough time to cross the bridge and reach the finish before the next wave threatens you. By staying tight to cover first and using full commitment second, you avoid the two common failures: getting hit while exposed and running out of time because of hesitation.
Common Mistakes in Drive Mad Level 116
- Leaving the safety of the wall before the first shockwave has passed
- Not hiding the full truck behind the wall
- Waiting too long after the blast disappears
- Hesitating on the soft bridge instead of committing to the run
- Trying to outrun the shockwave without using cover first
Fast Summary
- Drive directly to the first tall wall
- Use the wall as cover for the first shockwave
- Wait until the blast fully disappears
- Accelerate immediately across the bridge
- Reach the finish before the next shockwave cycle
FAQ
How do you beat Drive Mad Level 116?
Hide behind the first tall wall until the shockwave passes, then accelerate right away across the bridge and reach the finish before the next blast arrives.
Why is Drive Mad Level 116 difficult?
Because the road is easy but the timing is strict. Leaving cover too early or starting the sprint too late both cause the shockwave to catch you.
What is the key trick in Drive Mad Level 116?
The key trick is using the wall as a physical shield. Once the first wave is blocked, the rest of the level is just one fast run during the safe window.
When should I start moving in Shockwave?
Start the instant the first shockwave disappears. That gives you the best chance to cross the bridge and finish before the second blast cycle.