Drive Mad Level 67 Walkthrough - Chick Guide
Complete Drive Mad level 67 walkthrough. Learn how to beat Chick by reading the chick's jump rhythm, catching it on your truck roof, ferrying it across the gaps, and stopping in…
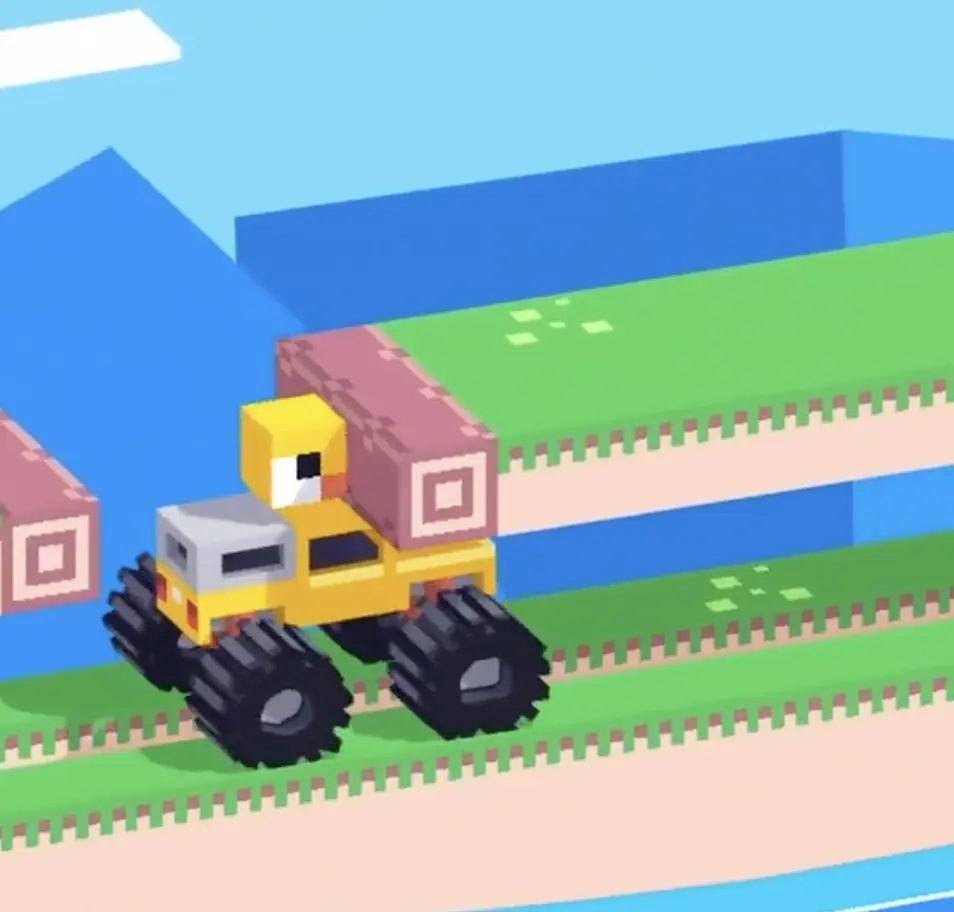
Drive Mad level 67, called Chick, is an easy level built around timing, escort control, and calm positioning. The truck itself is not the real object you are trying to deliver. Instead, your job is to help a small chick move across the stage. The chick jumps forward automatically at a fixed rhythm and distance, but the route contains gaps it cannot cross alone. That means you must act like a moving platform. You need to predict where the chick will land, catch it safely on your roof, and then carry it forward until it can jump onto the next safe platform.
Why Level 67 Feels Hard
This level feels tricky because you are solving someone else's movement pattern instead of controlling everything directly. The chick never waits for you. It keeps jumping at the same pace, so your truck has to arrive early and be stable at the exact landing moment. Many failures happen when players focus too much on driving and forget that the chick's timing is the true clock of the level. If the truck is too late, the chick falls into the gap. If the truck is still moving too much when the chick lands, it can bounce off or fail to transfer cleanly.
Step-by-Step Walkthrough for Drive Mad Level 67
Step 1: Watch the chick's rhythm before you start moving seriously
At the beginning, do not immediately drive off. Stay calm and observe the chick for a moment. Its jump interval and forward distance are consistent, and that pattern tells you exactly how much lead time you need. This stage becomes much easier once you stop reacting late and start moving in advance. Think of the chick like a metronome. Once you understand the beat, the rest of the level becomes a matter of positioning rather than panic.

Step 2: Catch the chick on the roof and ferry it across the gap
When the chick is about to jump into a section with a gap, drive the truck into position early and line the roof up directly beneath the landing point. The key is not just getting there, but stopping cleanly. Keep the truck as still as possible so the chick lands near the middle of the roof instead of sliding off. Once it is safely on board, move forward slowly and steadily until the chick can reach the next platform. Then stop again and let it jump off by itself. This level rewards smooth escorting, not aggressive driving.
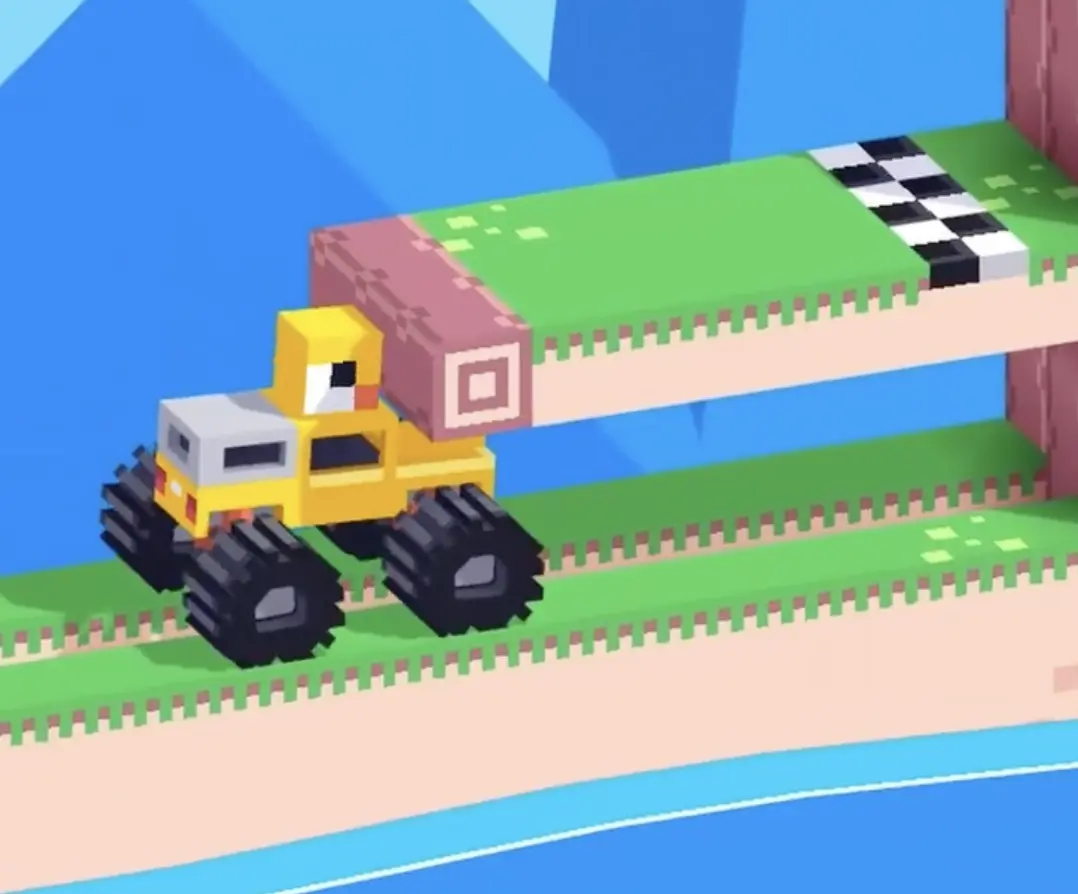
Step 3: Stop under the final ledge and let the chick jump into the finish side
Near the end, the same rule still applies: do not overdrive just because the finish is visible. Bring the truck forward until the chick has a clear jump to the last platform with the checkered line, then stop and wait. Once it lands on the final section, your job is basically done. Stay calm and let the chick make its last hop into the finish area naturally. The easiest way to fail here is to keep moving when you should already be parked.
Best Cue for Consistent Clears
Be early, be still, be safe.
Why This Method Works
This method works because the chick's movement is predictable while yours is flexible. The chick always jumps with the same rhythm, so the level is really testing whether you can convert that fixed pattern into good positioning. By watching first, you remove guesswork. By arriving a little early, you stop needing last-second corrections. By keeping the truck still during the landing, you turn the roof into a reliable platform instead of a moving hazard. And by ferrying slowly, you preserve balance so the chick can transfer safely from truck to platform every time.
Key Tips for Level 67
- Leave yourself some lead time because the chick never pauses for you
- Try to catch the chick near the middle of the roof, not at the edge
- Once the chick lands, move slowly so it stays stable on the truck
- Stop completely before expecting the chick to jump to the next platform
- Treat each transfer as a clean relay instead of one continuous drive
Common Mistakes in Drive Mad Level 67
- Driving too early without first reading the chick's jump rhythm
- Arriving late under the landing point and letting the chick fall into the gap
- Still moving too much when the chick lands on the roof
- Carrying too fast and throwing off the chick's balance
- Overdriving near the finish instead of stopping and letting the chick jump by itself
Fast Summary
- Watch the chick's jump rhythm first
- Move under the landing point before the gap jump happens
- Stop so the chick lands safely on the truck roof
- Escort it forward slowly until it can reach the next platform
- Repeat and let the chick jump into the finish area on its own
FAQ
How do you beat Drive Mad Level 67?
Watch the chick's jump rhythm, position the truck under its landing point before each gap, catch it on the roof, and slowly carry it to the next safe platform until it reaches the finish.
Why is Drive Mad Level 67 difficult?
Because the chick moves automatically and will not wait for you, so the challenge is all about timing your position and keeping the truck stable during each transfer.
What is the main trick in Drive Mad Level 67?
The main trick is treating the truck like a moving ferry. You are not racing to the finish yourself. You are escorting the chick across gaps it cannot cross alone.
What usually causes failure in Drive Mad Level 67?
Most failures come from bad timing, too much momentum, poor balance during the catch, or moving too late and missing the chick's landing point.
Do you need to rush in Chick?
No. The safest method is to move slightly early, stop cleanly for each landing, and let the chick handle the jumps by itself.