Drive Mad Level 121 Walkthrough - Max Height Guide
Complete Drive Mad level 121 walkthrough. Learn how to beat Max Height by using a last-second brake tap to make the truck dip forward and lower its front height enough to slip u…
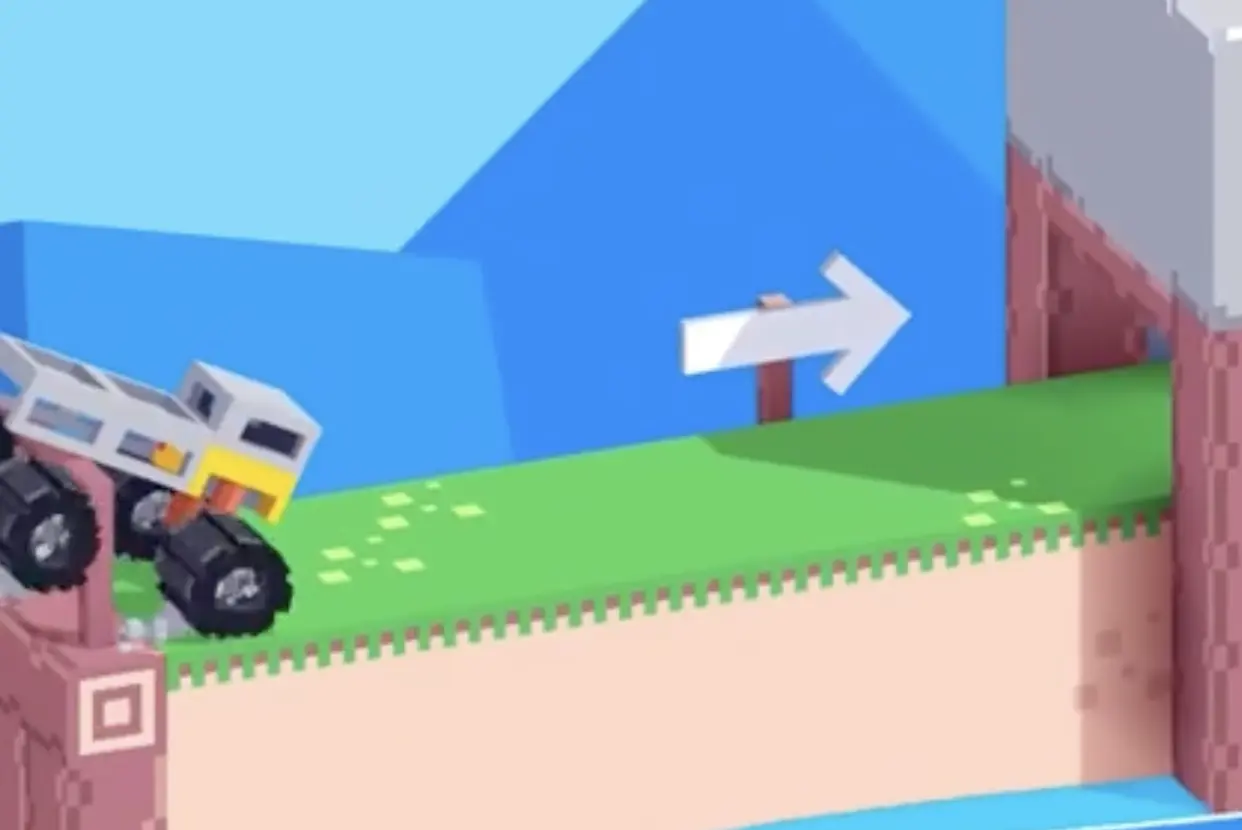
Drive Mad level 121, called Max Height, is a hard level built around dynamic height rather than speed. At rest, the truck is simply too tall to fit into the low cave entrance ahead. The solution is not to find another path. It is to temporarily change the truck's shape through inertia. By releasing forward input and tapping reverse at the exact moment before the front touches the ceiling, you force the chassis to pitch forward in a quick nod. That brief dip lowers the front enough to slip under the opening and lets the truck settle back down safely inside.
Why Level 121 Feels Hard
This Drive Mad level feels unfair at first because the obstacle looks like a simple height check, yet the truck appears to fail even when you approach cleanly. The real test is timing, back lift control, and obstacle timing. If you keep holding forward, the truck stays too tall and smashes into the upper lip. If you brake too early, the front drops before reaching the opening and rises again at the wrong time. If you brake too late, the roof catches the ceiling before the dip happens. The whole level comes down to creating the forward pitch at exactly the right distance.
Step-by-Step Walkthrough for Drive Mad Level 121
Step 1: Brake at the last instant to make the truck dip forward
Drive toward the low opening at a normal, controlled speed. As the front bumper gets close to the upper edge of the cave, release forward and quickly tap reverse or brake. The truck's momentum throws the body forward into a sharp nod, lowering the front end just enough to fit under the ceiling.
The best timing is extremely late. A good visual cue is when the front bumper is about half a wheel's distance from the cave entrance. Brake there, not earlier. This level is all about catching that tiny window where the dip and the opening line up at the same moment.
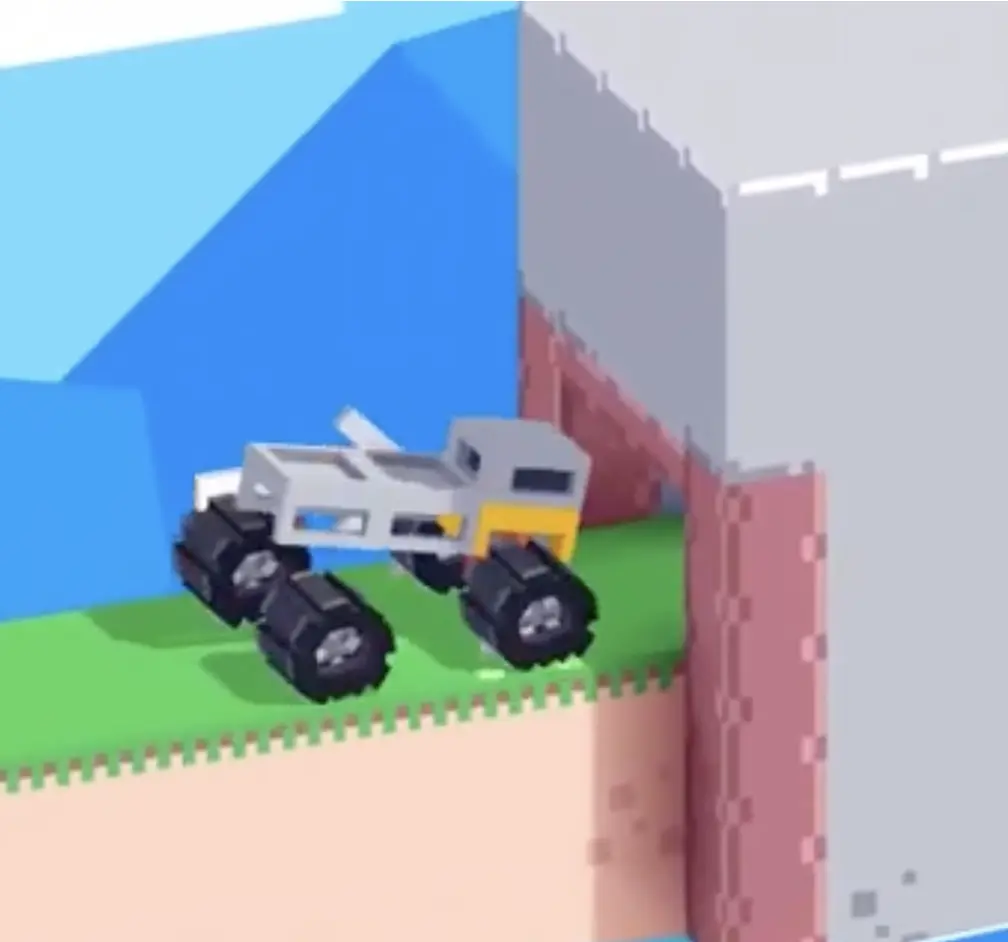
Step 2: Let the truck settle inside the cave and roll to the finish
Once the front clears the entrance, do not overreact. The truck will settle back down under gravity as it moves inside the tunnel. From there, keep the input smooth and let it continue forward normally until you reach the finish.
Most failed recoveries happen because players panic after the first dip and add extra braking or acceleration. You only need one clean pitch change. After that, the level is basically over as long as you stay calm and keep the truck stable.
Best Cue for Consistent Clears
Think in one rhythm: approach, late brake tap, nose dip, then coast through.
Why This Method Works
This method works because the level does not actually require a smaller truck. It requires a smaller truck at one exact moment. Braking shifts the vehicle's weight forward and temporarily lowers the front profile. That instant is enough to get the nose under the cave lip, after which the rest of the chassis follows and settles back down. By using inertia instead of raw speed, you turn what looks like an impossible clearance into a repeatable timing trick.
Common Mistakes in Drive Mad Level 121
- Holding forward all the way into the cave and staying too tall
- Braking too early so the truck lifts back up before the entrance
- Braking too late and hitting the upper edge before the dip starts
- Charging in too fast and losing control of the nod timing
- Adding extra inputs after entering instead of letting the truck settle
Fast Summary
- Approach the cave at a steady speed
- Release forward just before the front reaches the upper edge
- Tap reverse or brake to create a quick forward dip
- Use the lowered front height to slip under the entrance
- Let the truck settle and drive normally to the finish
FAQ
How do you beat Drive Mad Level 121?
Approach the low cave normally, then at the last moment tap reverse or brake so the truck pitches forward and lowers its nose enough to pass under the entrance.
Why is Drive Mad Level 121 difficult?
Because the truck is too tall in its normal posture, so the solution depends on a very small timing window where braking makes the front dip at exactly the right moment.
What is the key trick in Drive Mad Level 121?
The key trick is using inertia to change the truck's height dynamically. A last-second brake tap makes the front bow down just long enough to fit into the cave.
When should I brake in Max Height?
Brake extremely late, ideally when the front bumper is about half a wheel's length from the cave entrance. Too early or too late usually causes a collision.