Drive Mad Level 101 Walkthrough - Slider Guide
Complete Drive Mad level 101 walkthrough. Learn how to beat Slider by lifting the truck's front end, inserting the long nose bar into the stone gate slider, pressing the wall do…
Drive Mad level 101, called Slider, is a hard level built around momentum, obstacle timing, timing, and front lift. The finish is blocked by a huge stone wall, so simply driving faster does not help. The only way through is to use the truck's special front bar like a lever. You must lift the nose high enough, line the bar up with the slider slot above the stone gate, and then use the truck's weight and forward force to press the whole mechanism down into the ground. The level feels awkward at first because the winning move is not a jump or a crash. It is a precise insertion puzzle followed by a controlled push.
Why Level 101 Feels Hard
This Drive Mad level is difficult because the bar on the truck must meet the slider at exactly the right height and angle. If the nose stays too low, the bar hits the front of the wall and never enters the slot. If you rush the approach, the bar bounces off the surface instead of settling inside. Even after the bar connects, some attempts still fail because the truck loses its posture before enough downward pressure is applied. Once you stop treating the wall like something to ram and start treating it like something to hook and press, the solution becomes much more consistent.
Step-by-Step Walkthrough for Drive Mad Level 101
Step 1: Lift the front end so the bar reaches slider height
Right after the start, make a quick backward-to-forward weight shift so the front wheels rise sharply. The goal is to get the truck's long front bar level with, or slightly above, the upper edge of the slider slot. This front-lift setup matters more than raw speed. If you arrive flat, the bar has no chance of entering cleanly.
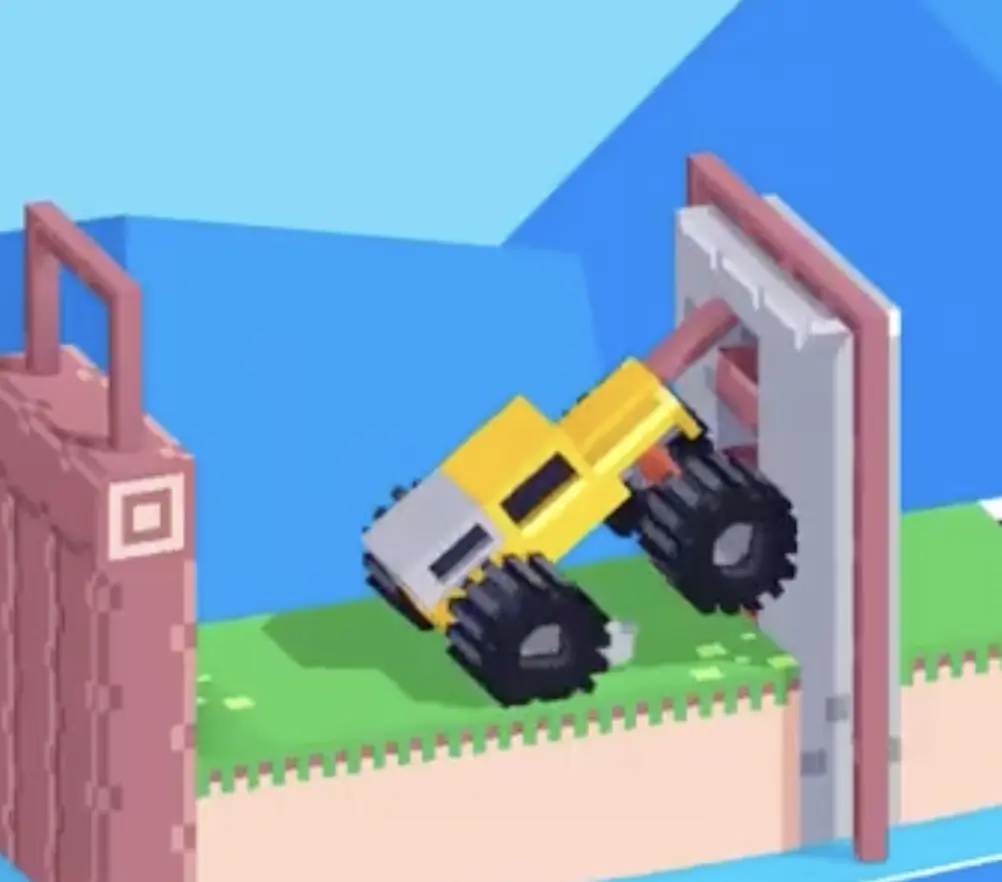
Step 2: Creep forward and insert the bar into the slider slot
While keeping the front end elevated, move forward carefully and let the bar slide into the opening. This part is about insertion, not impact. If the bar is only touching the outer face of the mechanism, it will slip off as soon as you try to press down. You want a real connection inside the slot before committing to the push.

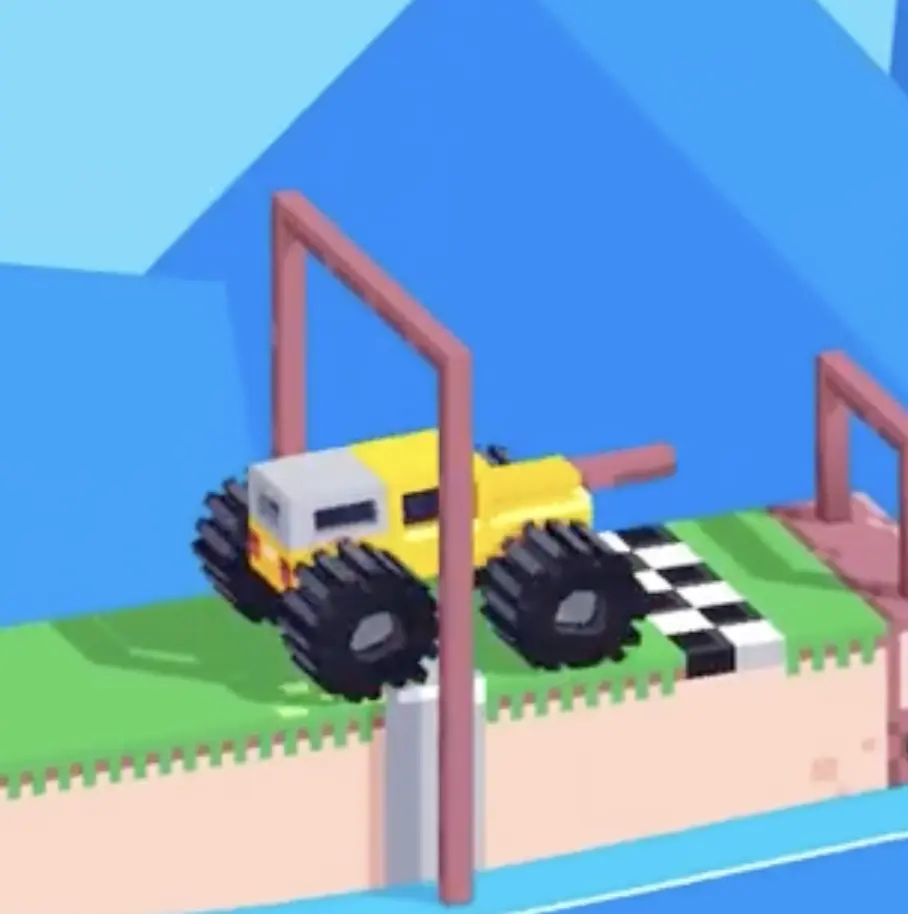
Step 3: Hold forward to press the wall down, then drive through
Once the bar is locked in, keep holding forward so the truck's force and body weight push the slider downward. The stone wall will sink steadily into the ground when the pressure is correct. As soon as the barrier disappears, keep your momentum and drive straight across the previously blocked area to touch the black-and-white finish.
Best Cue for Consistent Clears
Lift, slot, press.
Why This Method Works
This method works because the stone wall is controlled by a vertical slider rather than a normal trigger. The truck cannot brute-force the obstacle away from the front. It has to create leverage first. Lifting the nose sets the right angle, inserting the bar creates a stable connection, and sustained forward pressure converts the truck's shape into a downward press. Thinking of the level as a three-stage mechanical action makes it much easier to repeat: first gain height, then secure the slot, then cash that position into a clean gate drop.
Common Mistakes in Drive Mad Level 101
- Approaching too flat and leaving the bar below the slider opening
- Ramming the wall instead of inserting the bar into the slot
- Moving too fast during alignment and bouncing off the mechanism
- Losing the front-lift posture before the bar seats properly
- Releasing forward pressure too early before the wall fully sinks
Fast Summary
- Rock backward and forward to lift the truck's nose
- Match the bar height to the slider slot
- Insert the bar cleanly instead of crashing into the wall
- Hold forward to press the stone gate down
- Drive through and touch the finish
FAQ
How do you beat Drive Mad Level 101?
Lift the truck's front end, guide the long bar into the stone slider slot, keep pressing forward until the wall sinks, and then drive across to the finish.
Why is Drive Mad Level 101 difficult?
Because the winning move depends on height, angle, and timing rather than simple speed. The bar has to enter the slot cleanly before the wall can be pushed down.
What is the key trick in Drive Mad Level 101?
The key trick is to insert the bar into the slider instead of smashing into the stone wall. The level is about hooking the mechanism and pressing it, not breaking through it.
What should I do if the bar keeps missing the slot in Drive Mad Level 101?
Use a short backward move and then a sharp forward push to raise the nose higher. That extra front lift usually brings the bar level with the slot so it can enter cleanly.