Drive Mad Level 64 Walkthrough - Ski Lift Guide
Complete Drive Mad level 64 walkthrough. Learn how to beat Ski Lift by stabilizing the hanging vehicle, building enough momentum to jump from the upper rail to the lower rail, a…
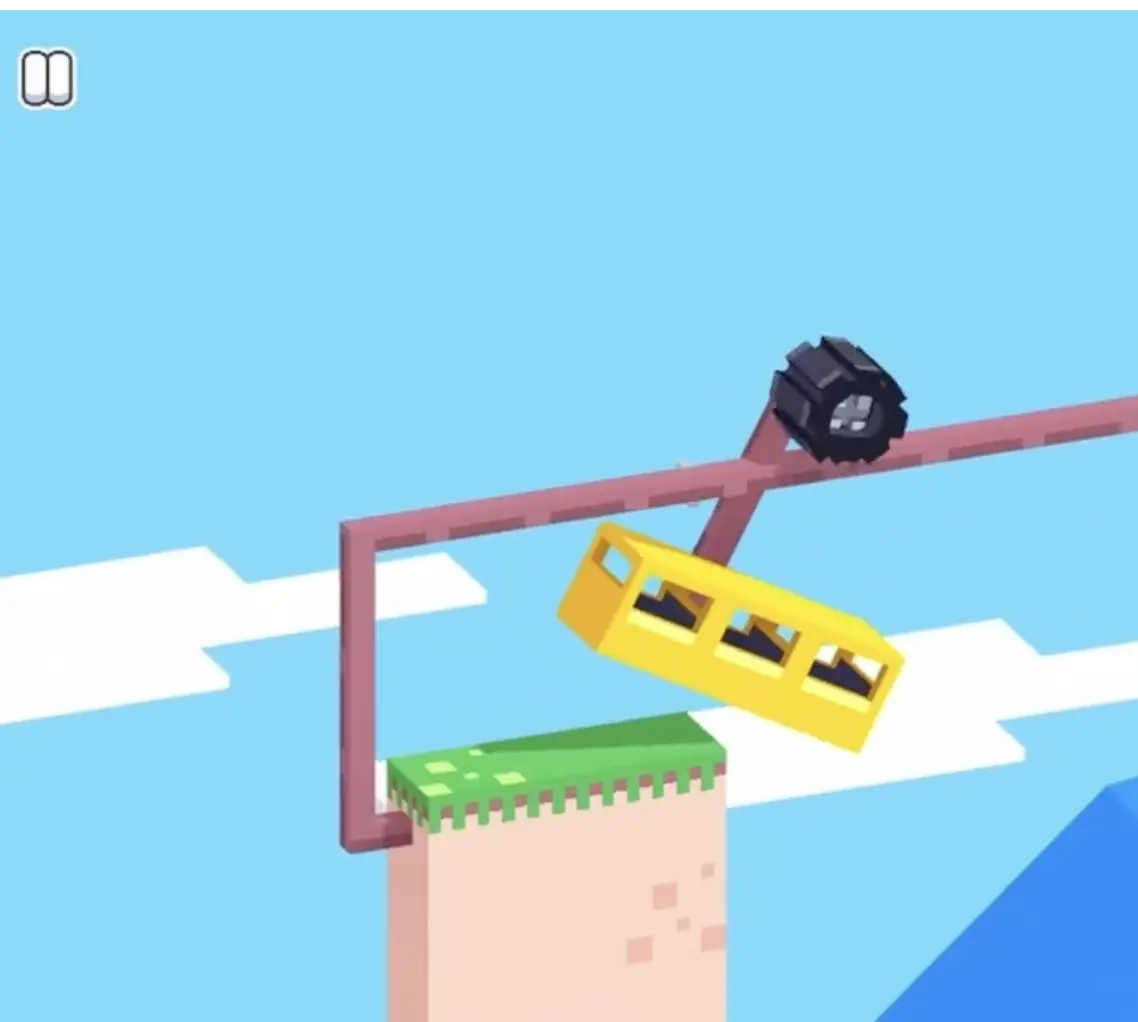
Drive Mad level 64, called Ski Lift, is an easy level built around suspended momentum and swing control. This is not a normal truck stage. The vehicle hangs from a single wheel that grips the overhead rail, which means the body dangles underneath like a gondola. Because of that, your driving logic changes completely. Instead of focusing on tire grip against the ground, you need to manage the hanging body's swing, keep the vehicle close to vertical, and build just enough momentum to transfer from the upper rail to the lower one without bouncing off.
Why Level 64 Feels Hard
This level feels awkward because the vehicle is always hanging below its only contact point. That makes every acceleration input create a pendulum effect. If you press too hard too early, the body starts swinging wildly and becomes hard to control. But if you move too slowly, the wheel cannot clear the large gap between rails and simply falls. So the stage is a balance test between speed and stability. You need enough momentum to make the transfer, but not so much that the landing shock knocks you off the second rail.
Step-by-Step Walkthrough for Drive Mad Level 64
Step 1: Learn the hanging swing and keep the body close to vertical
At the start, do not rush toward the gap. Use very light forward and backward taps to see how the suspended vehicle reacts. Because the body hangs below the rail, the safest condition is when it stays close to vertical with only a small amount of sway. This short warm-up is important because it teaches you how easily the vehicle starts to swing. Once you understand that rhythm, you can stop fighting the movement and begin using it productively.
Step 2: Build enough momentum to fly from the upper rail to the lower rail
As you approach the end of the first rail, begin accelerating with commitment. The gap is large enough that hesitation usually leads to failure. You want enough forward momentum for the wheel to leave the upper rail, travel through the air, and hook onto the lower rail cleanly. The important detail is that the jump is decided before takeoff. If the speed is too low, the wheel never reaches the second track. If the speed is too high, the landing becomes violent and unstable. This is why a clean, prepared run-up works better than frantic last-second tapping.

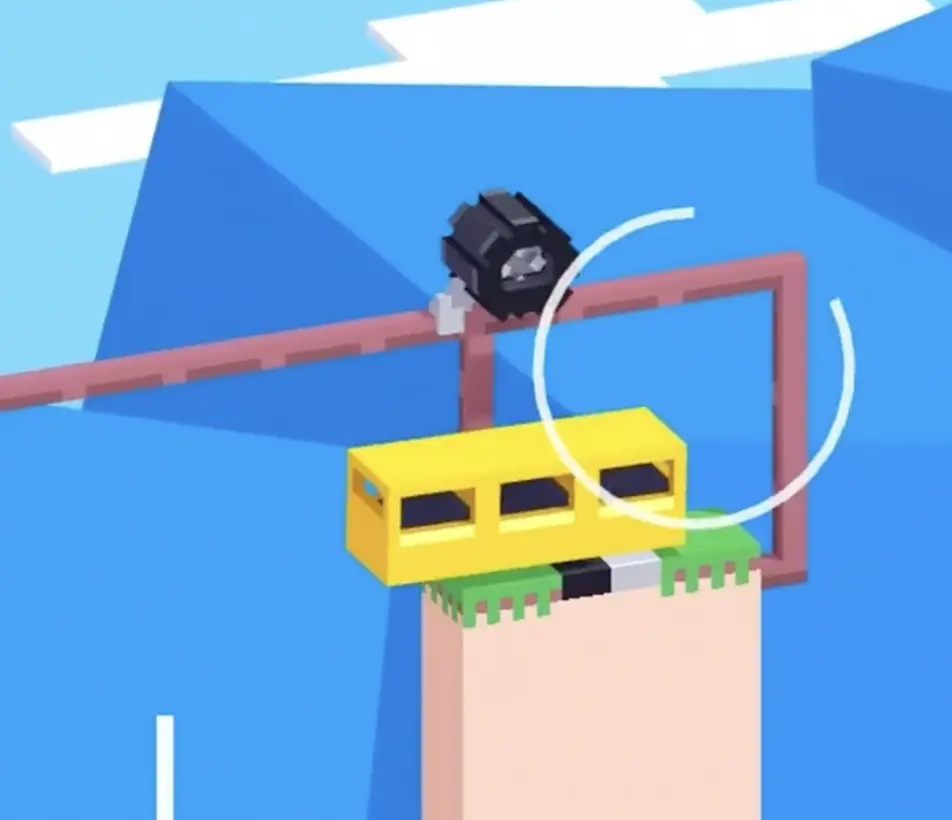
Step 3: Release input after landing and stabilize the final slide to the finish
Once the wheel catches the lower rail, ease off immediately. Do not keep holding the throttle just because the finish is close. The landing impact naturally creates extra sway, and pressing more input right away often turns that sway into a full loss of balance. Instead, let the vehicle settle, make tiny corrections if needed, and then glide the rest of the way to the checkered platform. The last section is easy as long as you respect the landing and do not overdrive it.
Best Cue for Consistent Clears
Swing small, launch clean, land calm.
Why This Method Works
This method works because the stage is controlled by suspended inertia rather than normal ground traction. The wheel on top determines whether you stay attached to the rail, but the hanging body below determines how stable that attachment feels. Small calibration taps reduce unnecessary swinging at the start. A committed but measured burst gives the wheel enough momentum to bridge the gap. Then, releasing input after the catch prevents the landing shock from turning into a bounce or derailment. In other words, the cleanest clear comes from separating the level into three jobs: stabilize, transfer, then settle.
Key Tips for Level 64
- Treat the vehicle like a hanging pendulum, not a normal car
- Keeping the body near vertical is the safest sliding position
- The gap requires commitment, so do not hesitate at the rail edge
- Release the throttle quickly after the wheel hooks the lower rail
- A smooth landing is more important than carrying extra speed near the finish
Common Mistakes in Drive Mad Level 64
- Accelerating too hard at the start and creating uncontrollable swing
- Approaching the rail gap too slowly and falling short of the lower track
- Overcommitting speed and bouncing badly on the lower rail
- Holding the throttle after landing instead of letting the swing settle
- Panicking near the finish and turning a safe slide into a derailment
Fast Summary
- Use small taps to understand the hanging swing
- Keep the body as vertical as possible on the upper rail
- Build enough momentum to clear the rail gap cleanly
- Let the wheel catch the lower rail
- Release input, stabilize, and slide into the finish
FAQ
How do you beat Drive Mad Level 64?
Stabilize the hanging vehicle with small taps, build enough momentum to jump from the upper rail to the lower rail, then ease off and balance the final slide into the finish.
Why is Drive Mad Level 64 difficult?
Because the vehicle hangs from the rail, so every input creates swing. You need enough speed to cross the gap, but also enough control to stop the landing from throwing you off.
What is the main trick in Drive Mad Level 64?
The main trick is suspended momentum control. You are not driving across ground. You are managing a hanging body so the wheel can transfer cleanly from one rail to another.
What usually causes failure in Drive Mad Level 64?
Most failures come from bad timing, weak or excessive momentum, too much pendulum swing, or failing to stabilize after landing on the second rail.
Should you keep accelerating after the rail transfer in Ski Lift?
No. The safest method is to release input right after the wheel catches the lower rail, then calm the swing before sliding to the finish.