Drive Mad Level 123 Walkthrough - Laser Gun Guide
Complete Drive Mad level 123 walkthrough. Learn how to beat Laser Gun by using the mounted laser to break each wall first, preserving momentum, and only driving through once the…
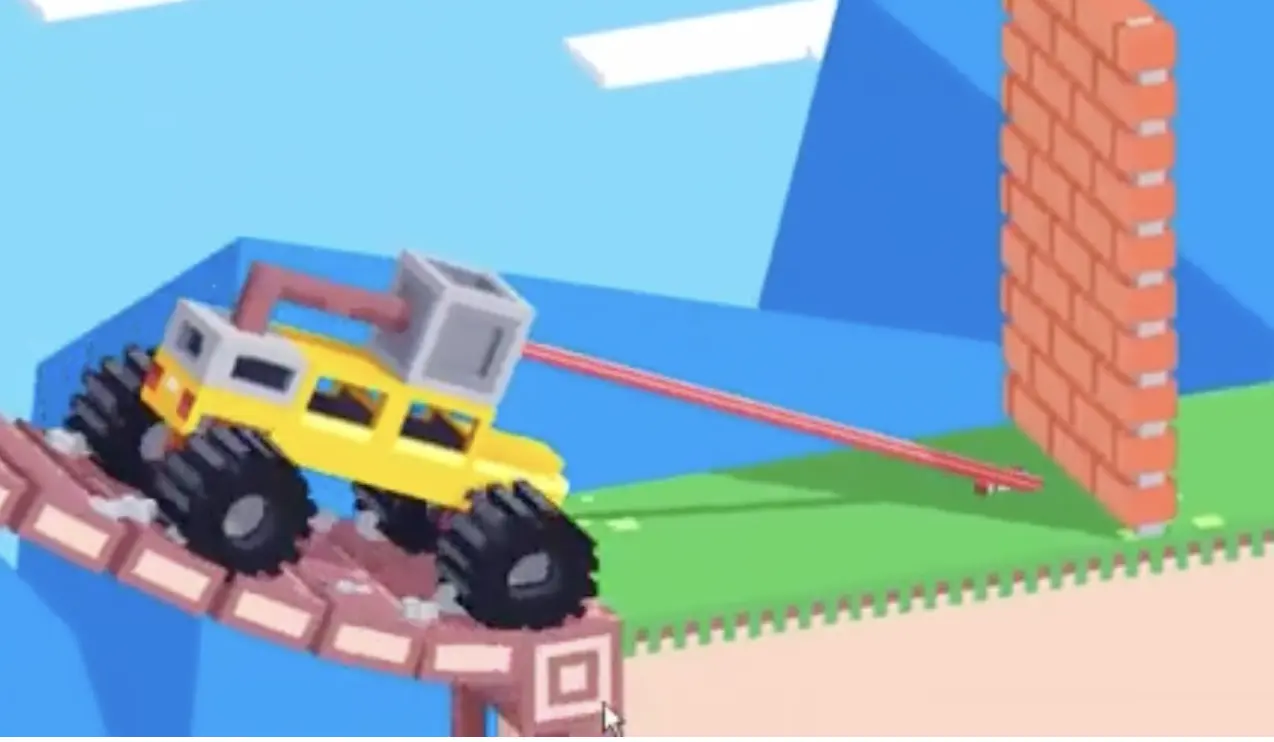
Drive Mad level 123, called Laser Gun, is an easy level built around timing. As part of the full Drive Mad levels progression, this stage gives your truck a laser weapon and asks you to use it to destroy a series of walls before driving through. The level looks simple, but it punishes impatience. If you accelerate into the wall before the laser fully breaks it, you lose speed and ruin the run. If you let the beam finish its work first, the rest of the level becomes very controlled. If you are looking for a reliable Drive Mad level walkthrough, this guide explains how to break the first wall efficiently, clear the three-wall section, and preserve momentum all the way to the finish.
Why Level 123 Feels Hard
This Drive Mad level feels awkward because the truck gives you a direct offensive tool, but the correct solution is still patient timing rather than aggression. The laser needs a short moment to weaken and destroy each wall. If you try to crash through too early, the remaining structure absorbs your momentum and slows you down. The stage is easiest when you treat every wall as a timing gate instead of a collision test.
Step-by-Step Walkthrough for Drive Mad Level 123
Step 1: Hold the laser on the first wall until it fully breaks
As the truck comes down the first slope and reaches the opening wall, keep the laser pointed at it for about two to three seconds. Watch for visible cracking and wait until the wall is completely destroyed before pushing forward.
Do not accelerate into the barrier before it breaks. Hitting an only partially damaged wall costs momentum and makes the rest of the section harder than it needs to be.
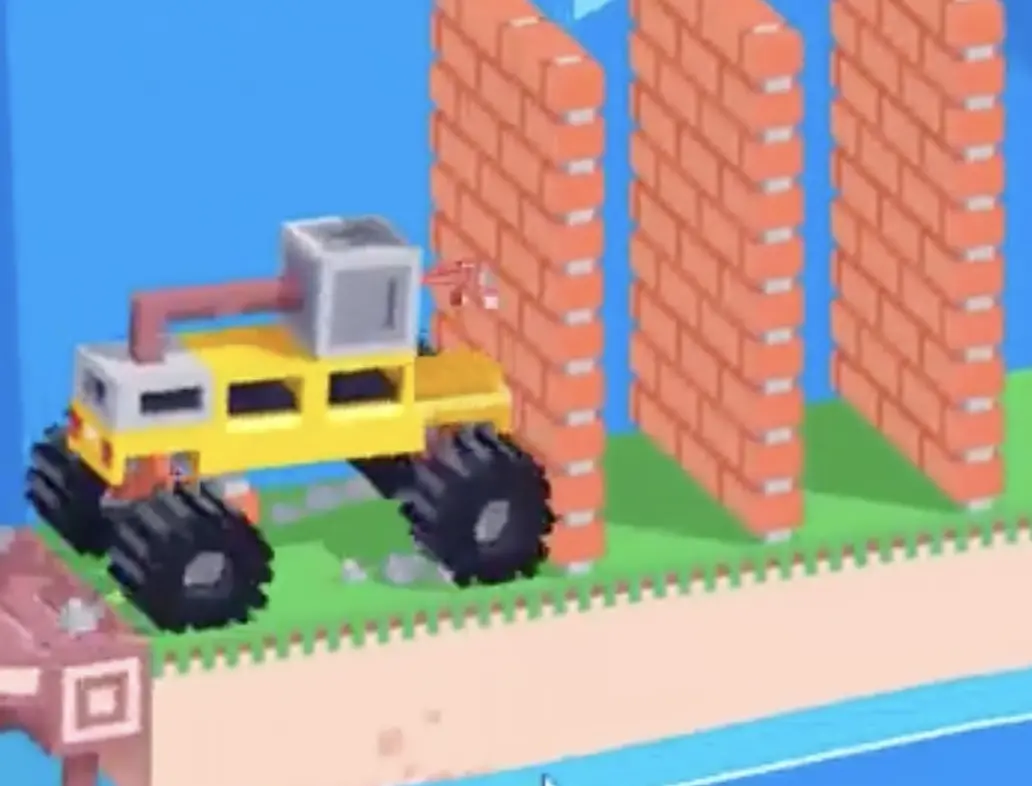
Step 2: Keep the truck straight and laser through the three-wall section one by one
After clearing the first obstacle, continue down the slope into the next sequence of three walls. Keep the truck pointed forward so the laser stays lined up with each wall cleanly.
Destroy each wall fully before entering the next space. Once the three-wall sequence is broken, small leftover debris or weak fragments usually do not need another laser pass. At that point, you can simply drive straight through to the finish.
Best Cue for Consistent Clears
Think in one rhythm: burn the wall, then drive through.
Why This Method Works
This method works because the laser removes the obstacle without forcing the truck to spend momentum on impact. Waiting for a full break keeps the path open and lets the truck roll through smoothly. In the later three-wall section, a straight approach keeps the beam aligned and reduces wasted repositioning. The level becomes very reliable once you stop treating the walls like things to ram and start treating them like targets that must be cleared in order.
Common Mistakes in Drive Mad Level 123
- Rushing into the first wall before it fully breaks
- Letting the truck drift off line in the three-wall section
- Trying to preserve time by ramming half-broken walls
- Not waiting for each wall to clear completely
- Overusing the laser on tiny leftover debris near the end
Fast Summary
- Laser the first wall for two to three seconds
- Wait for the full break before moving
- Keep the truck straight in the triple-wall section
- Break each wall one by one
- Drive through remaining light debris to the finish
FAQ
How do you beat Drive Mad Level 123?
Use the mounted laser to fully destroy each wall before driving forward, especially in the three-wall section where clean timing matters more than raw speed.
Why is Drive Mad Level 123 difficult?
Because the level punishes impatience. If you hit a wall before the laser completely destroys it, you lose momentum and make the sequence harder.
What is the key trick in Drive Mad Level 123?
The key trick is simple: do not rush. Let the laser finish its job first, then move through once the wall is truly gone.
Do I need to laser every small fragment near the end?
Usually no. After the main walls are destroyed, light debris can often be driven through directly without wasting extra time on another laser pass.