Drive Mad Level 72 Walkthrough - Mountains Guide
Complete Drive Mad level 72 walkthrough. Learn how to beat Mountains by ignoring the fake foreground road, driving along the background ridge line, carrying enough speed for the…
Drive Mad level 72, called Mountains, is an easy level built around timing and gap control. The unusual trick is that the real road is not the obvious platform in the center of the screen. Instead, you have to drive on the mountain ridge in the background. That means the level is really testing whether you can ignore the fake foreground path, read the shape of the blue ridge line correctly, and adjust your speed for a few small but important height changes.
Why Level 72 Feels Hard
This level feels strange because your eyes are drawn toward the middle platform, but that is not the route that matters. The actual path sits behind it, formed by the top edges of the mountain shapes. Once you realize that, the challenge becomes much simpler, but there is still a small rhythm to the terrain. The first gap wants steady momentum, the second ledge wants a slightly raised front end, and the final section punishes unnecessary wobble. Most failures happen because players look at the wrong layer of the stage or reach the second break with a bad body angle.
Step-by-Step Walkthrough for Drive Mad Level 72
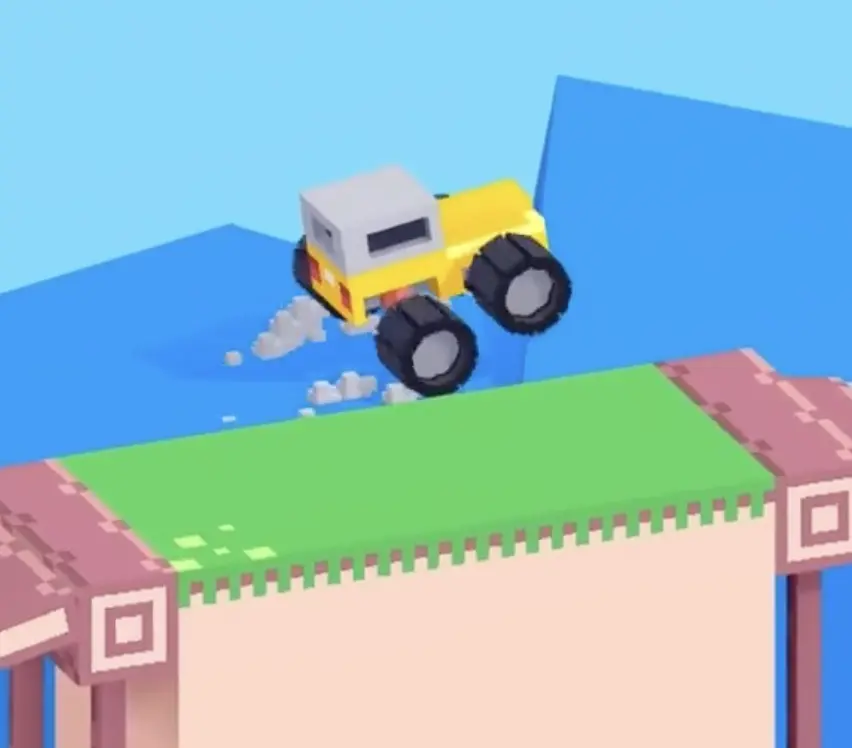
Step 1: Commit to the background ridge and carry enough speed for the first gap
As soon as the level starts, ignore the flat-looking platform in the middle and focus on the top edge of the background mountain. That ridge is the real route. Drive onto it with confidence and keep a medium-to-high pace for the first height change. You do not need reckless speed here, just enough momentum to clear the opening break smoothly without losing balance on landing.
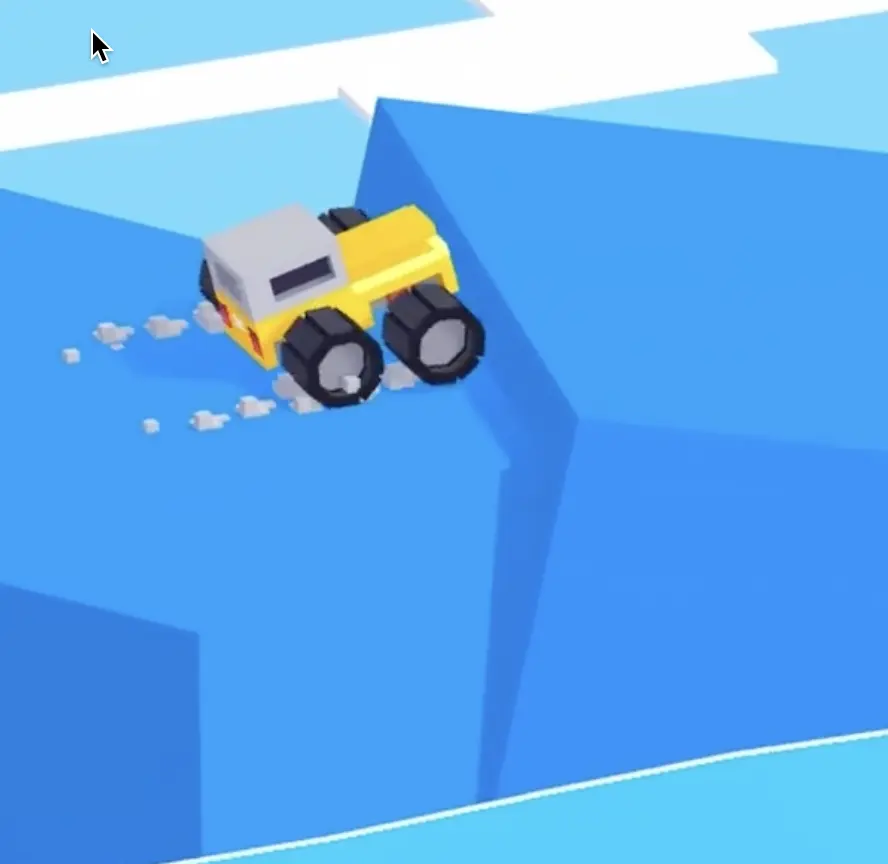
Step 2: Raise the nose slightly before the sharper second ledge
The second height difference is more abrupt and easier to miss. As you approach it, keep the truck balanced and give a small lift to the front if needed, either by terrain flow or a light backward tap. The goal is to help the front wheels catch the next ridge section cleanly instead of slamming into the edge and stopping dead. This is the one place in the level where body angle matters more than raw speed.
Step 3: Stay smooth across the final ridge section and drive straight into the finish
The last height change is gentler than the second one, so once you have crossed the sharper ledge, the level is nearly done. Keep the truck stable, stay on the throttle in a controlled way, and let it roll across the final ridge line. As long as you do not overcorrect or tilt the body badly, you can drive straight onto the finish without needing any extra trick.

Best Cue for Consistent Clears
Watch the ridge, not the road.
Why This Method Works
This method works because the real challenge is visual recognition first and physical control second. By focusing on the mountain ridge instead of the fake central path, you immediately solve the level's main deception. Then the remaining terrain can be handled with ordinary truck physics: enough momentum for the first gap, a slightly improved nose angle for the sharper second ledge, and calm balance through the last approach. Once you understand which layer of the map is actually drivable, the stage becomes a short sequence of readable ridge crossings.
Common Mistakes in Drive Mad Level 72
- Staring at the fake foreground road instead of the background mountain ridge
- Approaching the first gap too slowly and losing the basic crossing momentum
- Hitting the sharper second ledge with the nose too low
- Overcorrecting the truck in midair and ruining the landing angle
- Treating the final section like a big jump when it is really just a clean finish run
Fast Summary
- Ignore the fake road in the middle
- Drive on the background mountain ridge
- Use solid speed for the first gap
- Lift the nose slightly for the second sharp ledge
- Stay balanced through the last ridge and finish cleanly
FAQ
How do you beat Drive Mad Level 72?
Ignore the fake foreground path, drive along the background mountain ridge, clear the first gap with steady speed, raise the nose slightly for the second ledge, and stay balanced into the finish.
Why is Drive Mad Level 72 difficult?
Because the level tricks you visually. The true route is on the mountain ridge in the background, not on the obvious road in the middle of the screen.
What is the main trick in Drive Mad Level 72?
The main trick is background pathing. You have to track the top edge of the mountains as your real road and control the truck according to that hidden route.
What usually causes failure in Drive Mad Level 72?
Most failures happen when players follow the wrong visual path, approach the second ledge with a bad front-wheel angle, or lose balance between the ridge sections.
Do you need a lot of speed in Mountains?
Not maximum speed. The level is easier with controlled momentum: enough to clear the first break, but stable enough to handle the sharper second ledge cleanly.