Drive Mad Level 62 Walkthrough - Blind Spot Guide
Complete Drive Mad level 62 walkthrough. Learn how to beat Blind Spot by syncing with the first moving platform, reading the platform cycle, predicting the hidden platform behin…
Drive Mad level 62, called Blind Spot, is a medium level built around rhythmic prediction and blind navigation. The real problem is not raw driving difficulty, but limited information. Large walls block your view of the second moving platform, so you cannot simply react to what you see. Instead, you need to learn the timing from the visible platform, use that motion as a reference, and predict when the hidden platform will arrive under the blind jump. This level rewards counting, anticipation, and calm control much more than speed alone.
Why Level 62 Feels Hard
This level feels difficult because the most dangerous part happens where you cannot see clearly. The first moving platform is visible, so it teaches you the rhythm. But the second platform hides behind a wall, turning the jump into a timing puzzle instead of a visual one. Many players fail by treating the hidden section like a normal reaction test. That usually leads to jumping too late, missing the platform, or landing awkwardly on the edge and losing balance before they can escape the blind area.
Step-by-Step Walkthrough for Drive Mad Level 62
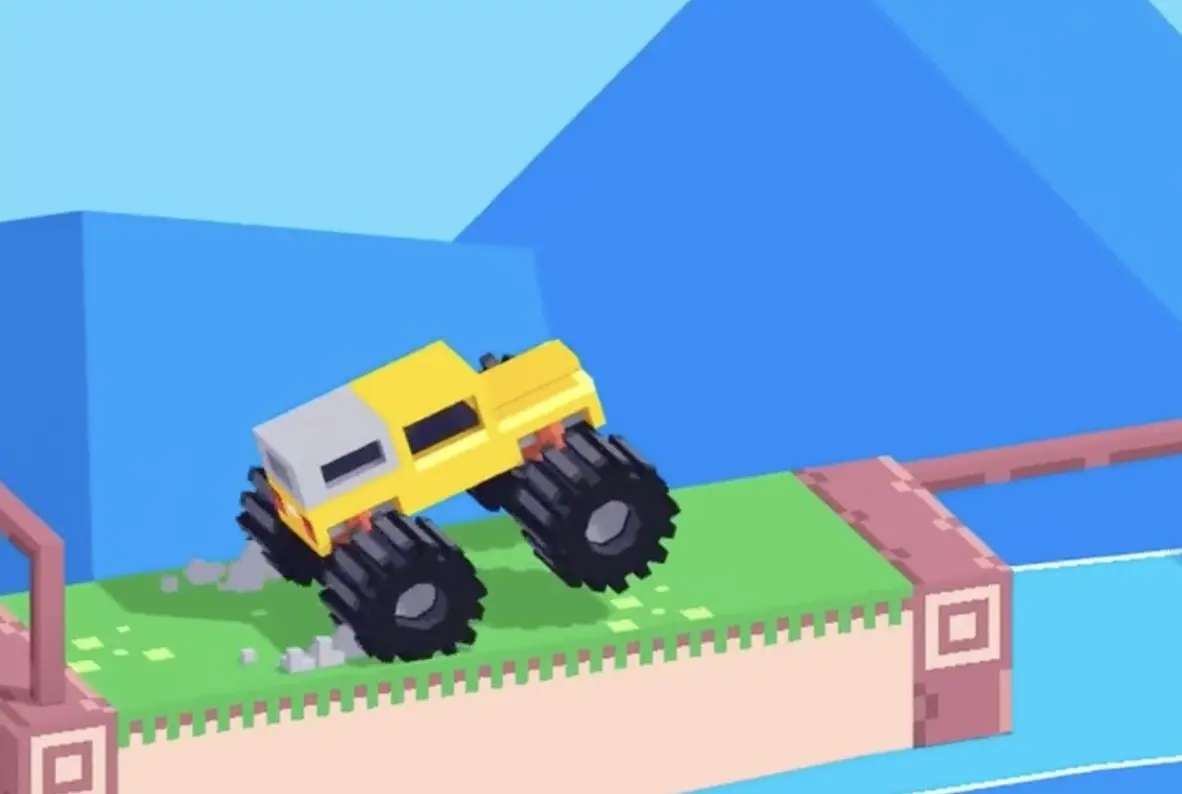
Step 1: Sync with the first moving platform and land inside its safe space
At the start, watch the first platform moving across the water and do not jump immediately. Wait until it is about to line up with your ledge, then accelerate onto it with enough momentum to settle the truck between the front and rear bumpers. Those small barriers help keep the truck from sliding off while the platform moves, but only if you enter cleanly. If you arrive crooked or too slowly, the truck can wobble at the edge and waste the whole attempt before the blind section even begins.
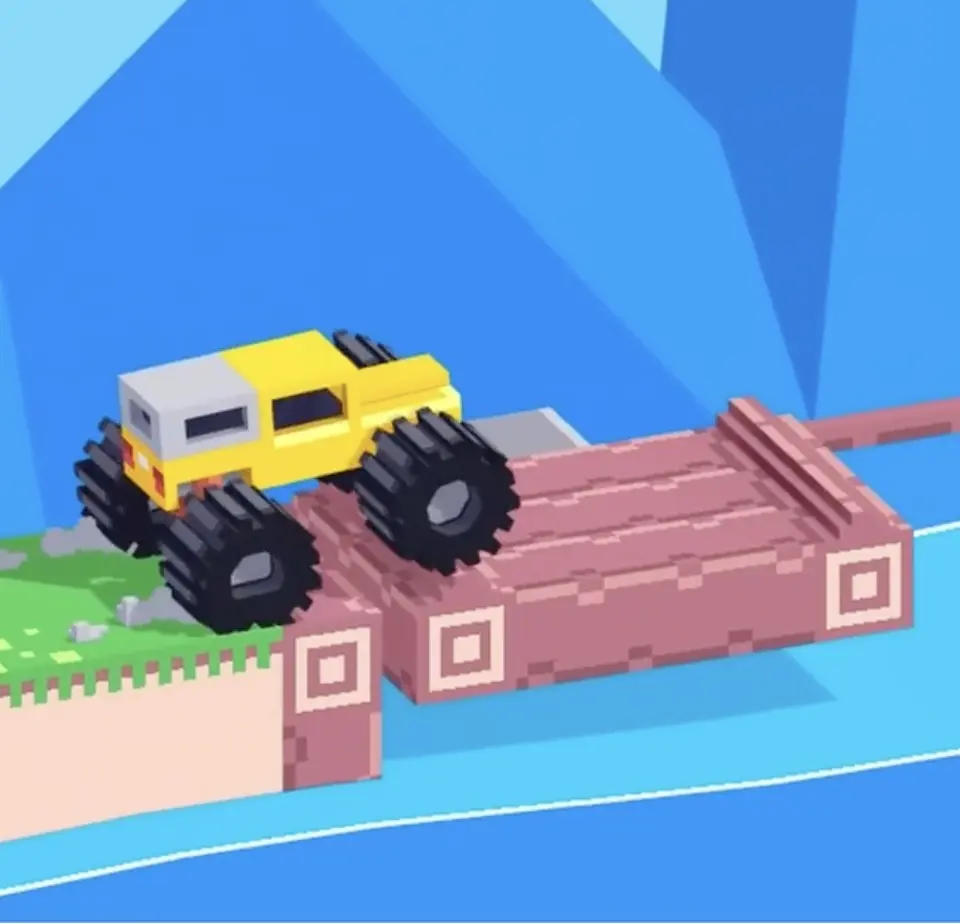
Step 2: Leave the first platform as soon as it reaches the far side and set up for the blind section
Before the first platform fully reaches the next ledge, start holding forward so the truck is ready to drive off the instant the gap closes. That keeps your rhythm smooth and gives you time to prepare for the harder part ahead. Once you reach the middle ground, do not waste movement. This is your visual calibration zone. Use it to remember the platform speed and cycle timing, because the hidden section ahead follows the same basic rhythm.
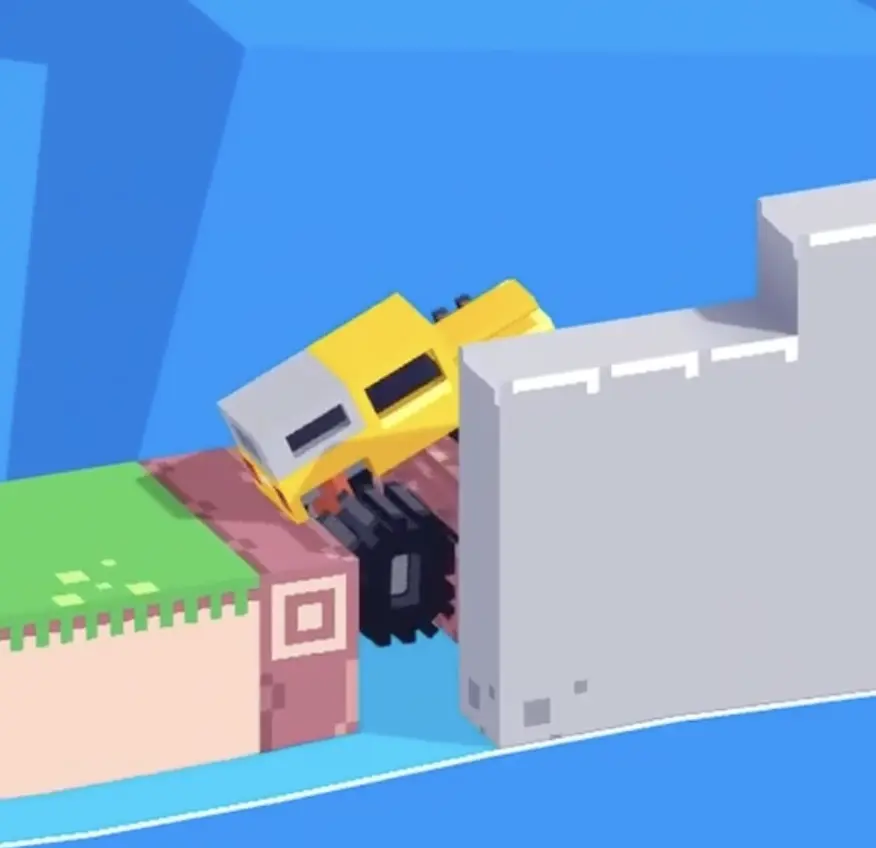
Step 3: Count the hidden platform cycle and jump slightly early into the blind spot
Now comes the core mechanic. The wall blocks most of your view, so you can only glimpse a tiny part of the moving platform behind it. Instead of waiting until you see it clearly, count the timing in your head based on the platform's disappear-and-reappear rhythm. Then start moving about half a beat early so the truck reaches the jump just as the hidden platform slides underneath. This is the key idea of the level: the blind section is solved by prediction, not by sight.
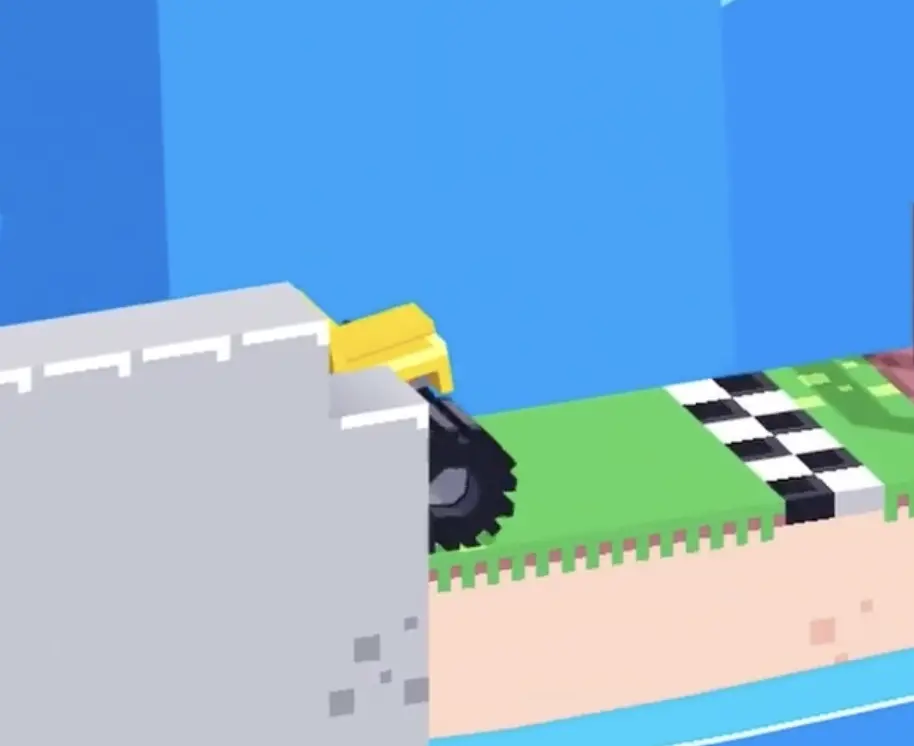
Step 4: Stay calm in the blind landing, then accelerate out to the finish
Even after you land, the wall still hides much of the truck, so you need to trust feel more than vision for a moment. If the truck seems to wobble, make only tiny corrections instead of panicking. Once you sense the platform nearing the far side, accelerate firmly and drive out of the blind zone. After the truck reappears, the hard part is done. Keep the wheels straight, continue forward, and roll directly onto the finish line.
Best Cue for Consistent Clears
Do not wait to see it. Jump when the rhythm says it is there.
Why This Method Works
This method works because the platforms follow a repeatable movement pattern, even when one of them disappears behind the wall. The first platform gives you a visible sample of the timing, speed, and travel rhythm. Once you understand that pattern, you can predict the hidden platform's position well enough to jump before it is fully visible. That early commitment is essential, because reacting late usually means the truck arrives after the platform has already moved away. By landing calmly and keeping small corrections inside the blind zone, you preserve balance long enough to drive out cleanly.
Key Tips for Level 62
- Use the first visible platform as your timing reference for the hidden one
- Enter each moving platform with enough speed to settle between its bumpers
- On the blind jump, start slightly early instead of waiting for a perfect visual cue
- If the truck wobbles behind the wall, use tiny taps rather than large corrections
- Once the hidden platform reaches the far side, accelerate out immediately
Common Mistakes in Drive Mad Level 62
- Jumping onto the first platform too late and landing on the edge
- Leaving the first platform too slowly and ruining the rhythm for the next section
- Trying to react visually to the hidden platform instead of predicting its timing
- Starting the blind jump too late and missing the moving platform completely
- Panicking in the blind landing and overcorrecting before the truck reappears
Fast Summary
- Wait for the first platform to align and board it cleanly
- Ride across and drive off the moment it reaches the far ledge
- Use that platform rhythm to predict the hidden platform behind the wall
- Jump slightly early into the blind section
- Land calmly, drive out, and finish
FAQ
How do you beat Drive Mad Level 62?
Catch the first moving platform, drive off when it reaches the far ledge, then predict the hidden platform's timing behind the wall, jump slightly early, and accelerate out to the finish.
Why is Drive Mad Level 62 difficult?
Because the second moving platform is mostly hidden by a wall, so the hardest jump depends on timing and prediction rather than clear visibility.
What is the main trick in Drive Mad Level 62?
The main trick is using the visible platform's rhythm to estimate where the hidden platform will be in the blind section.
What usually causes failure in Drive Mad Level 62?
Most failures come from poor timing, weak momentum on the jump, bad balance on the moving platforms, or waiting too long before committing to the blind landing.
Should you wait until you can fully see the platform in Blind Spot?
No. The safest method is to predict the platform's arrival from its rhythm and jump slightly early, because reacting late usually makes you miss it.